
# Form Trigger
The workflow execution is triggered by submitting the form.

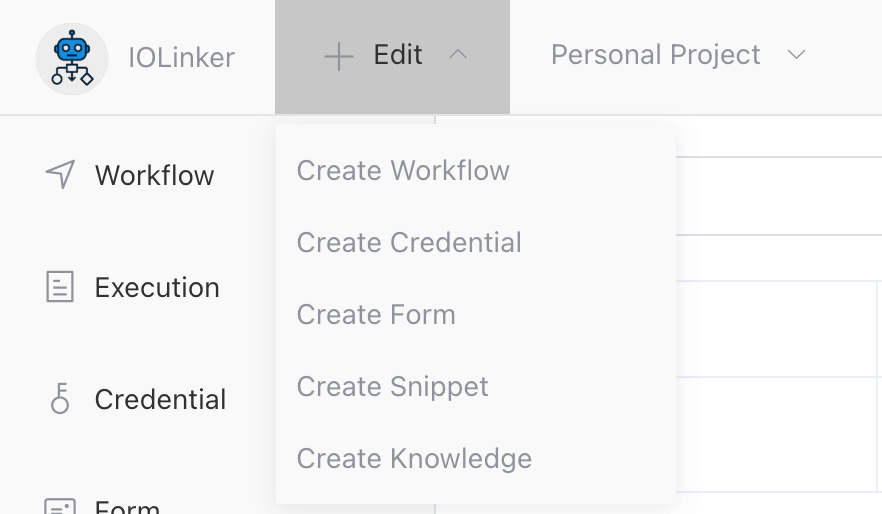
# Steps
# 1. Create Form
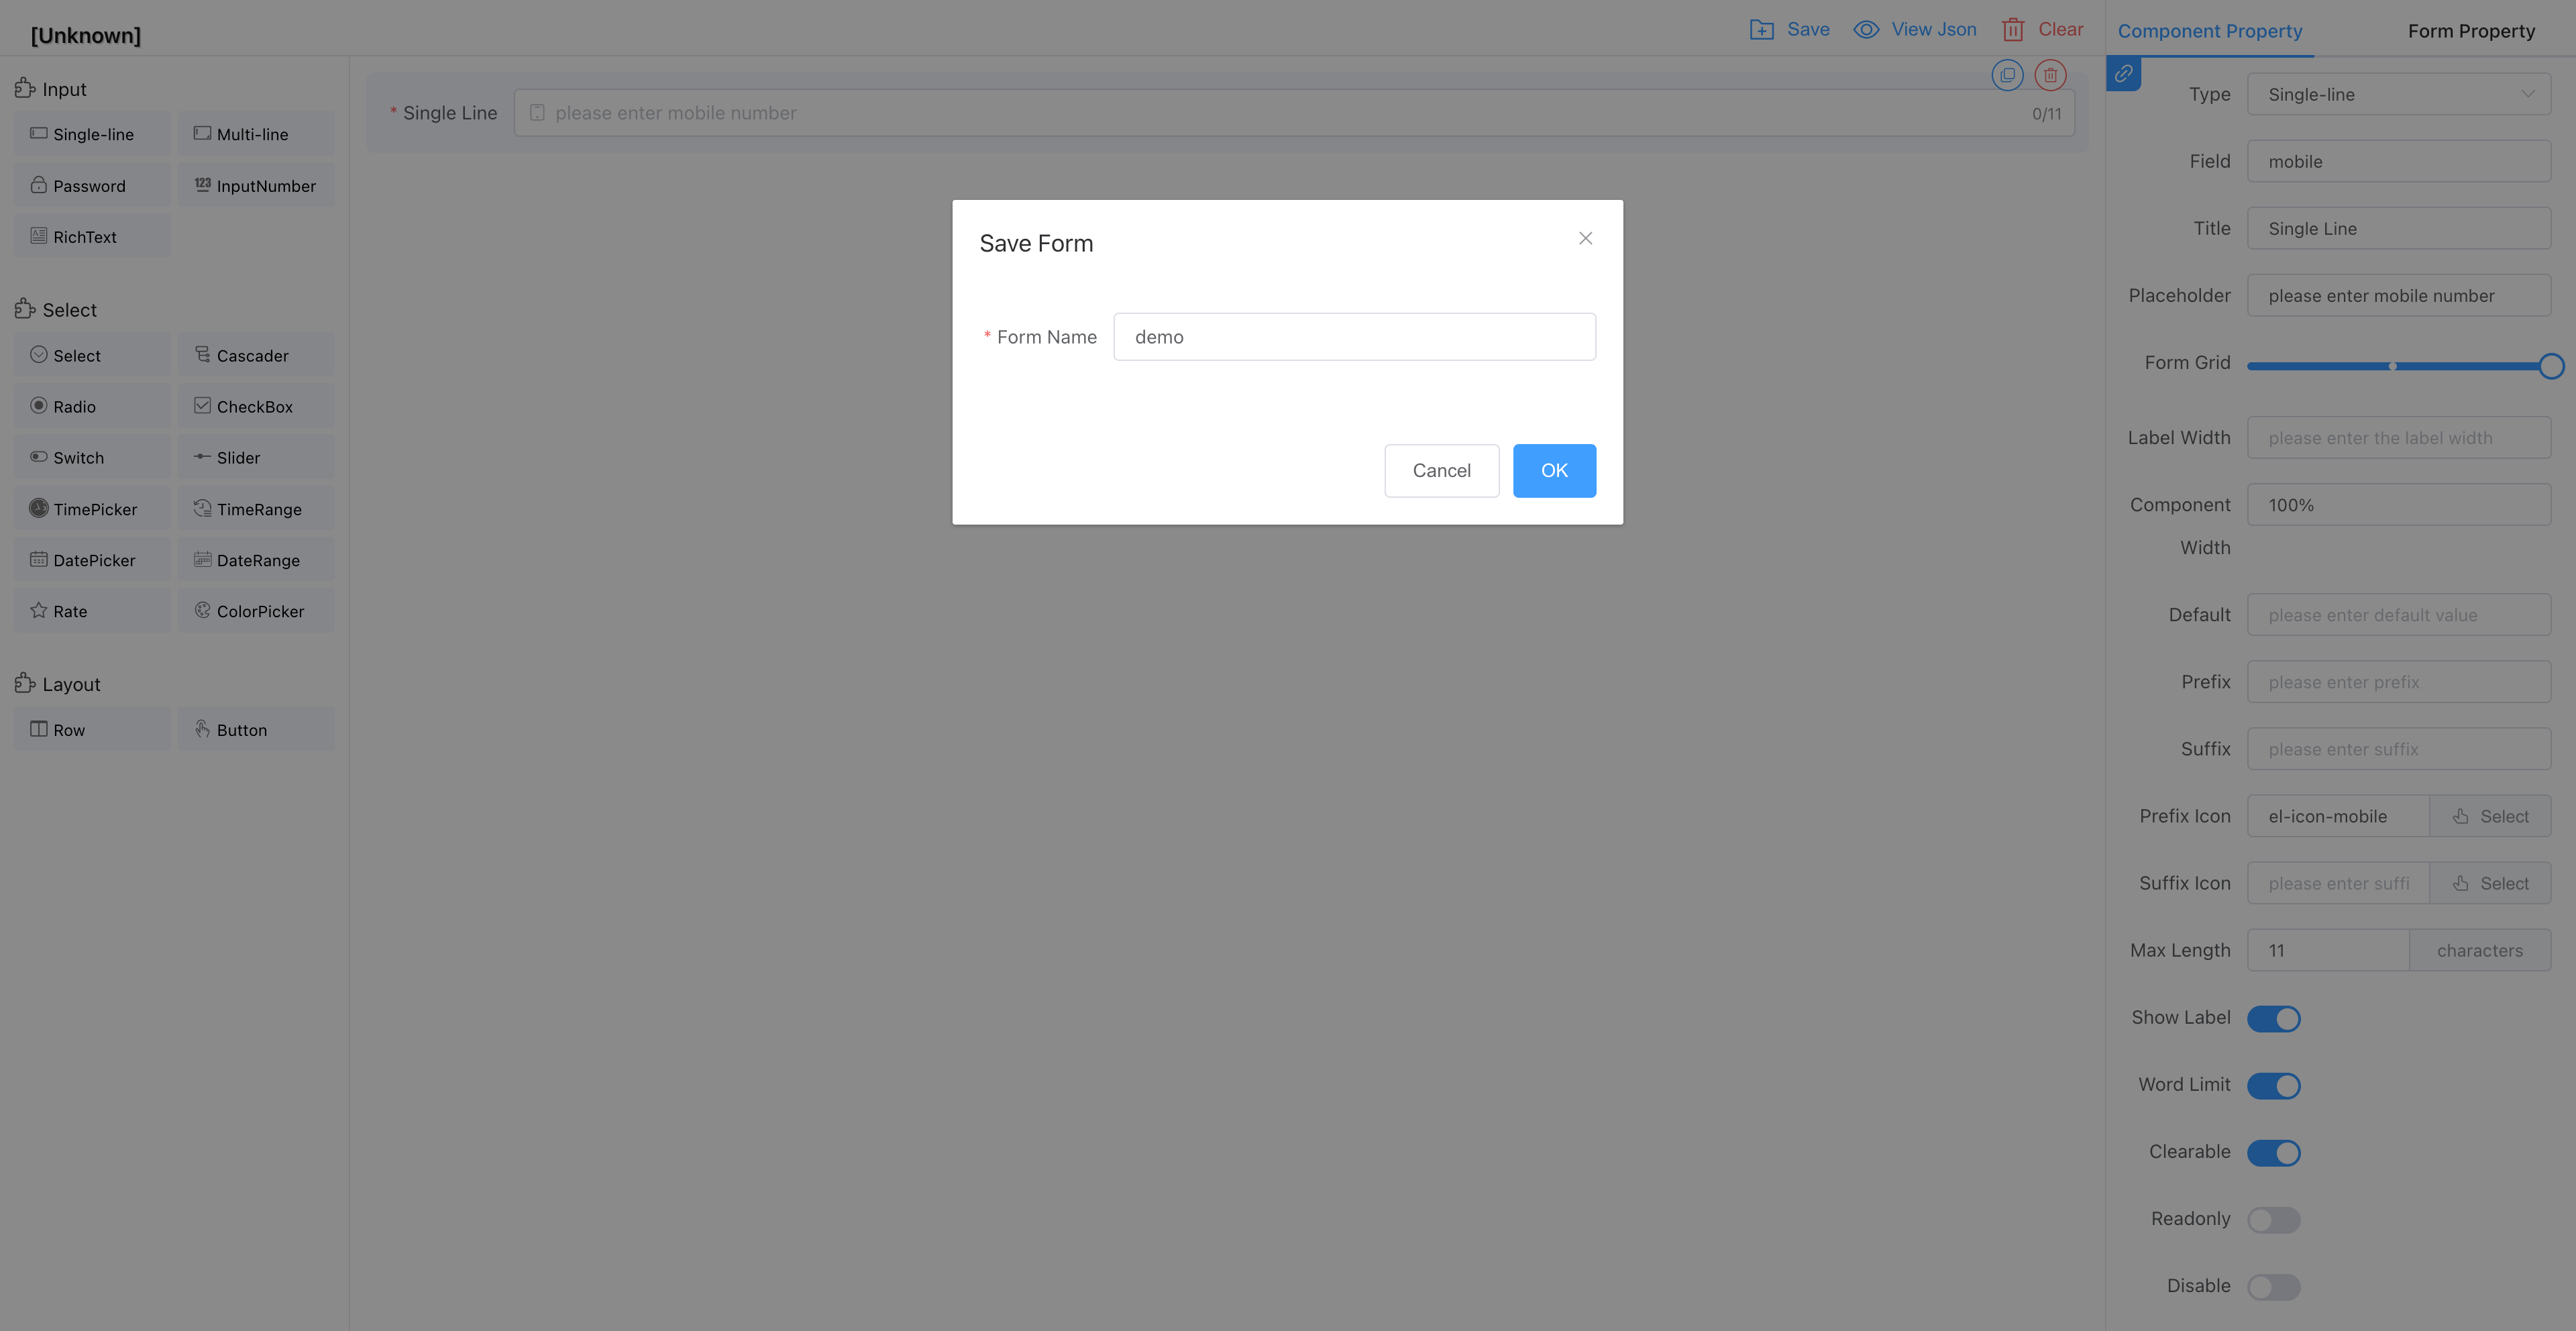
# 2. Design And Save Form
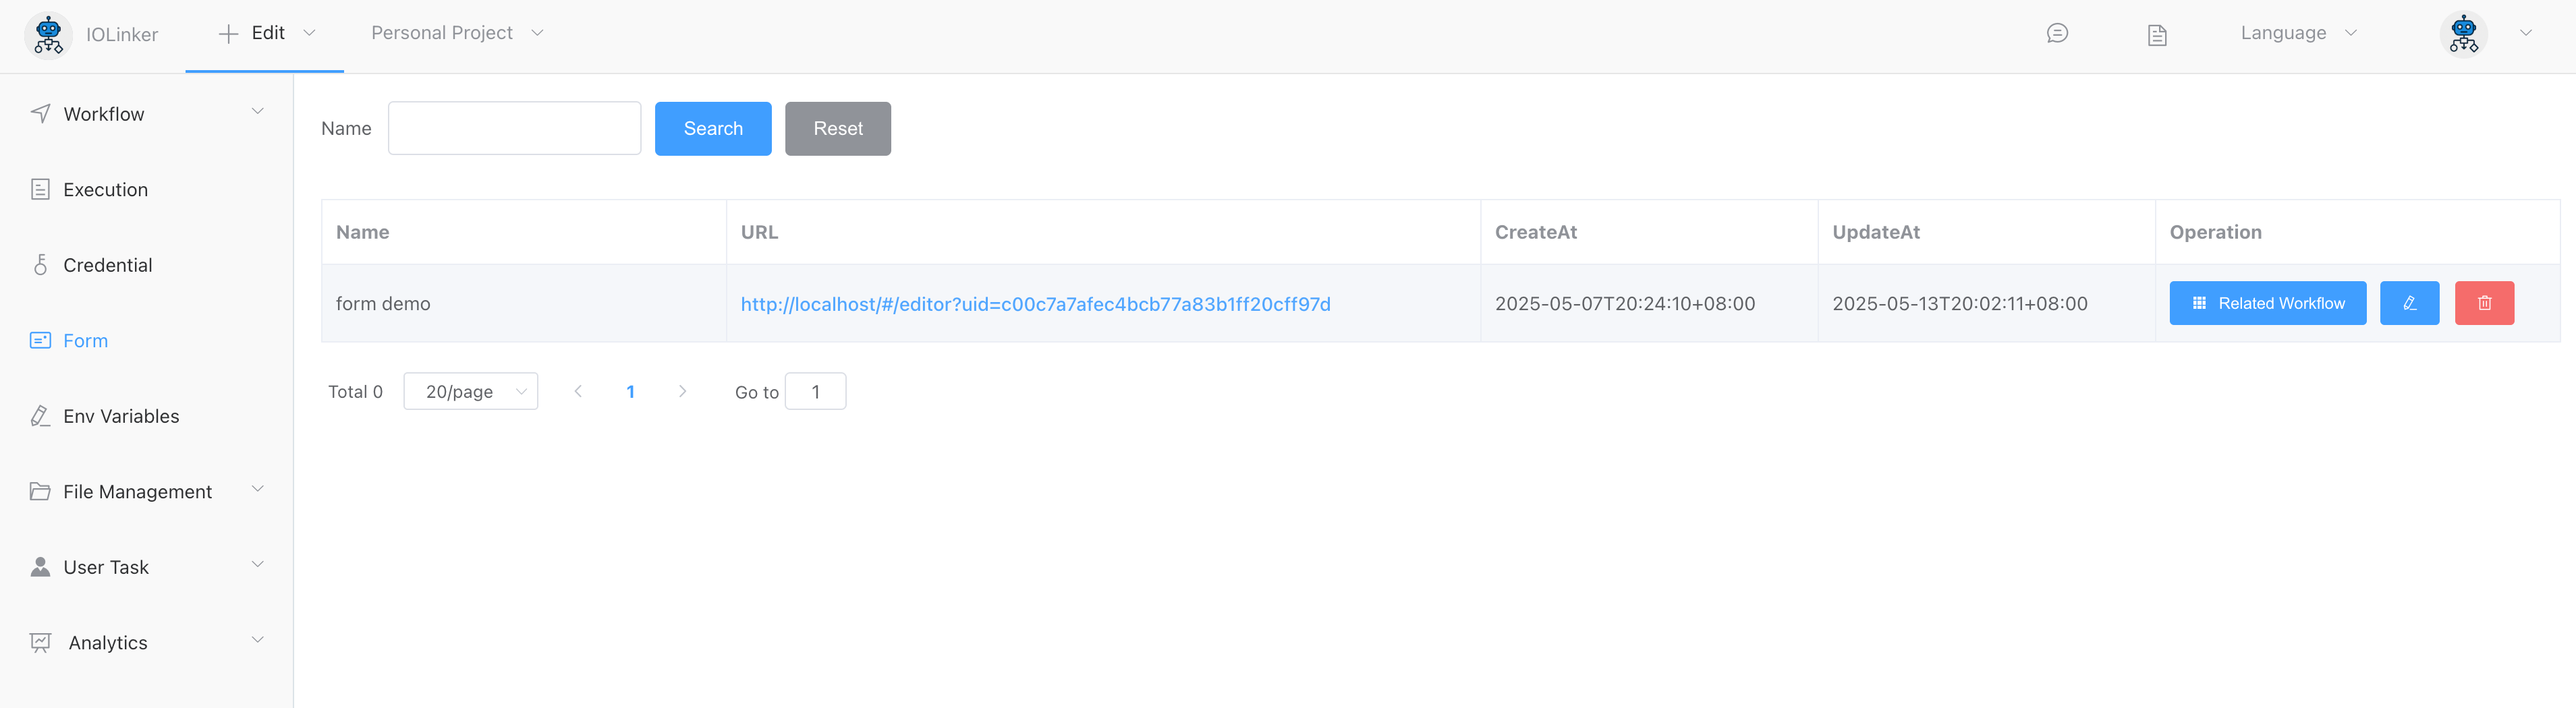
The saved form can be viewed in the [Form] menu option on the left:
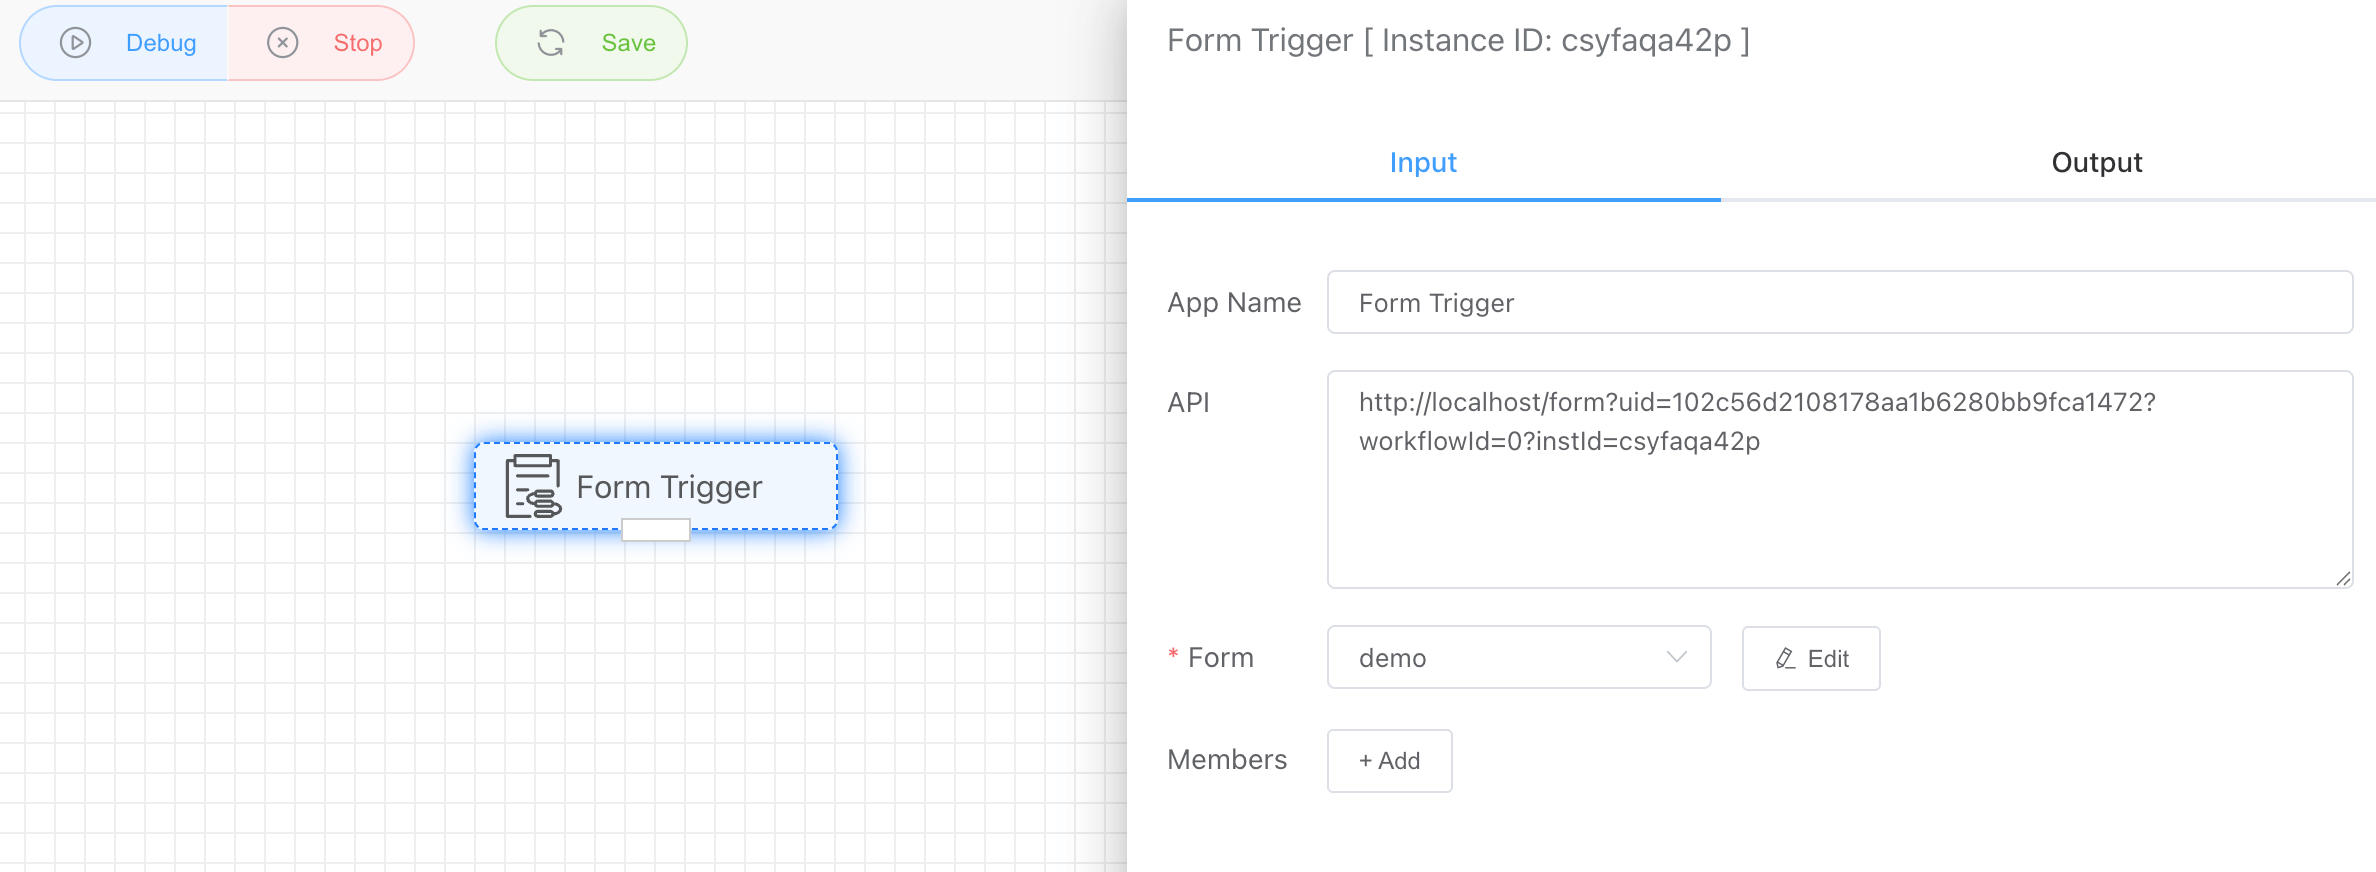
# 3. Create Workflow And Connect Form
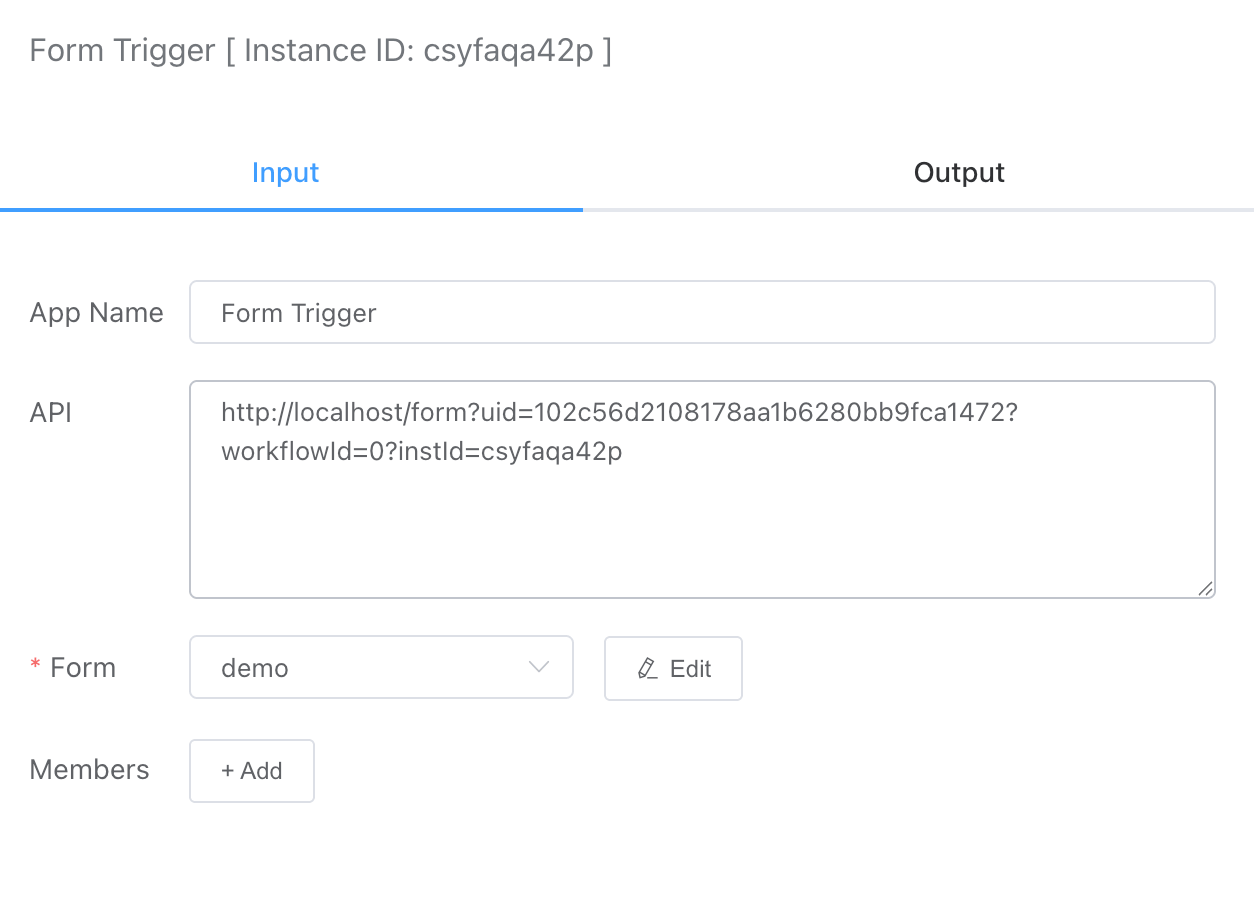
Use [Form Trigger] and select the previously created form in the form drop-down list. You will see that the API option will generate a form submission address. This address is uniquely bound to the workflow. You can submit the form by opening the address to trigger the workflow execution.
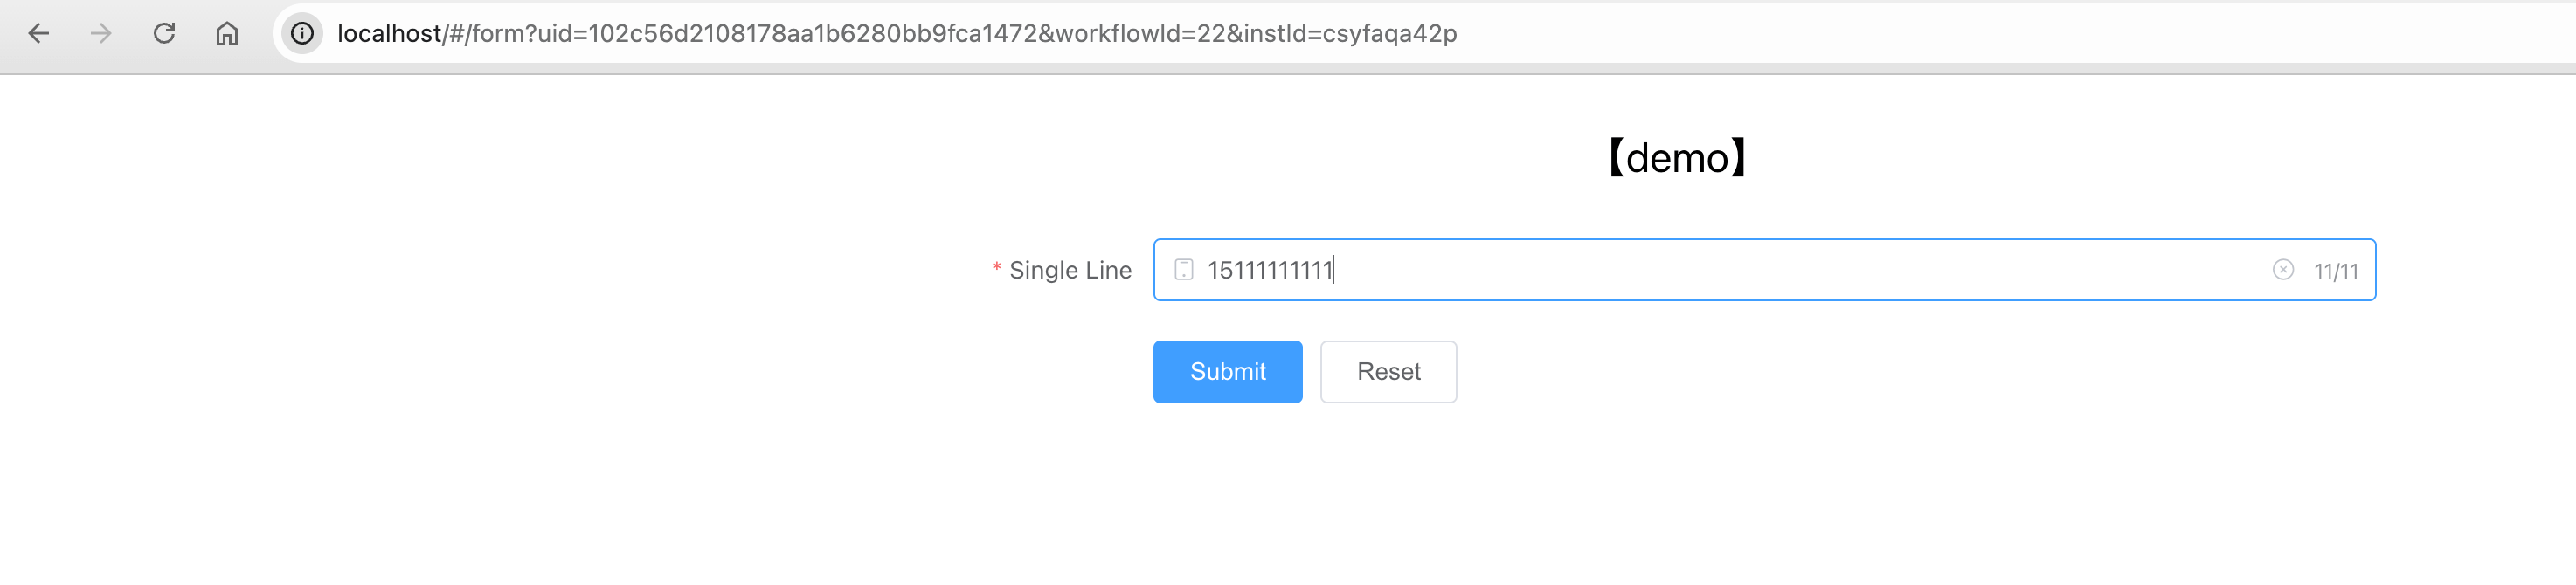
# 4. Submit Form
You can see the form submission address in [Workflow] and click it to enter the form submission address.

Click the [Submit] button, and you can see a workflow execution record in the execution record.
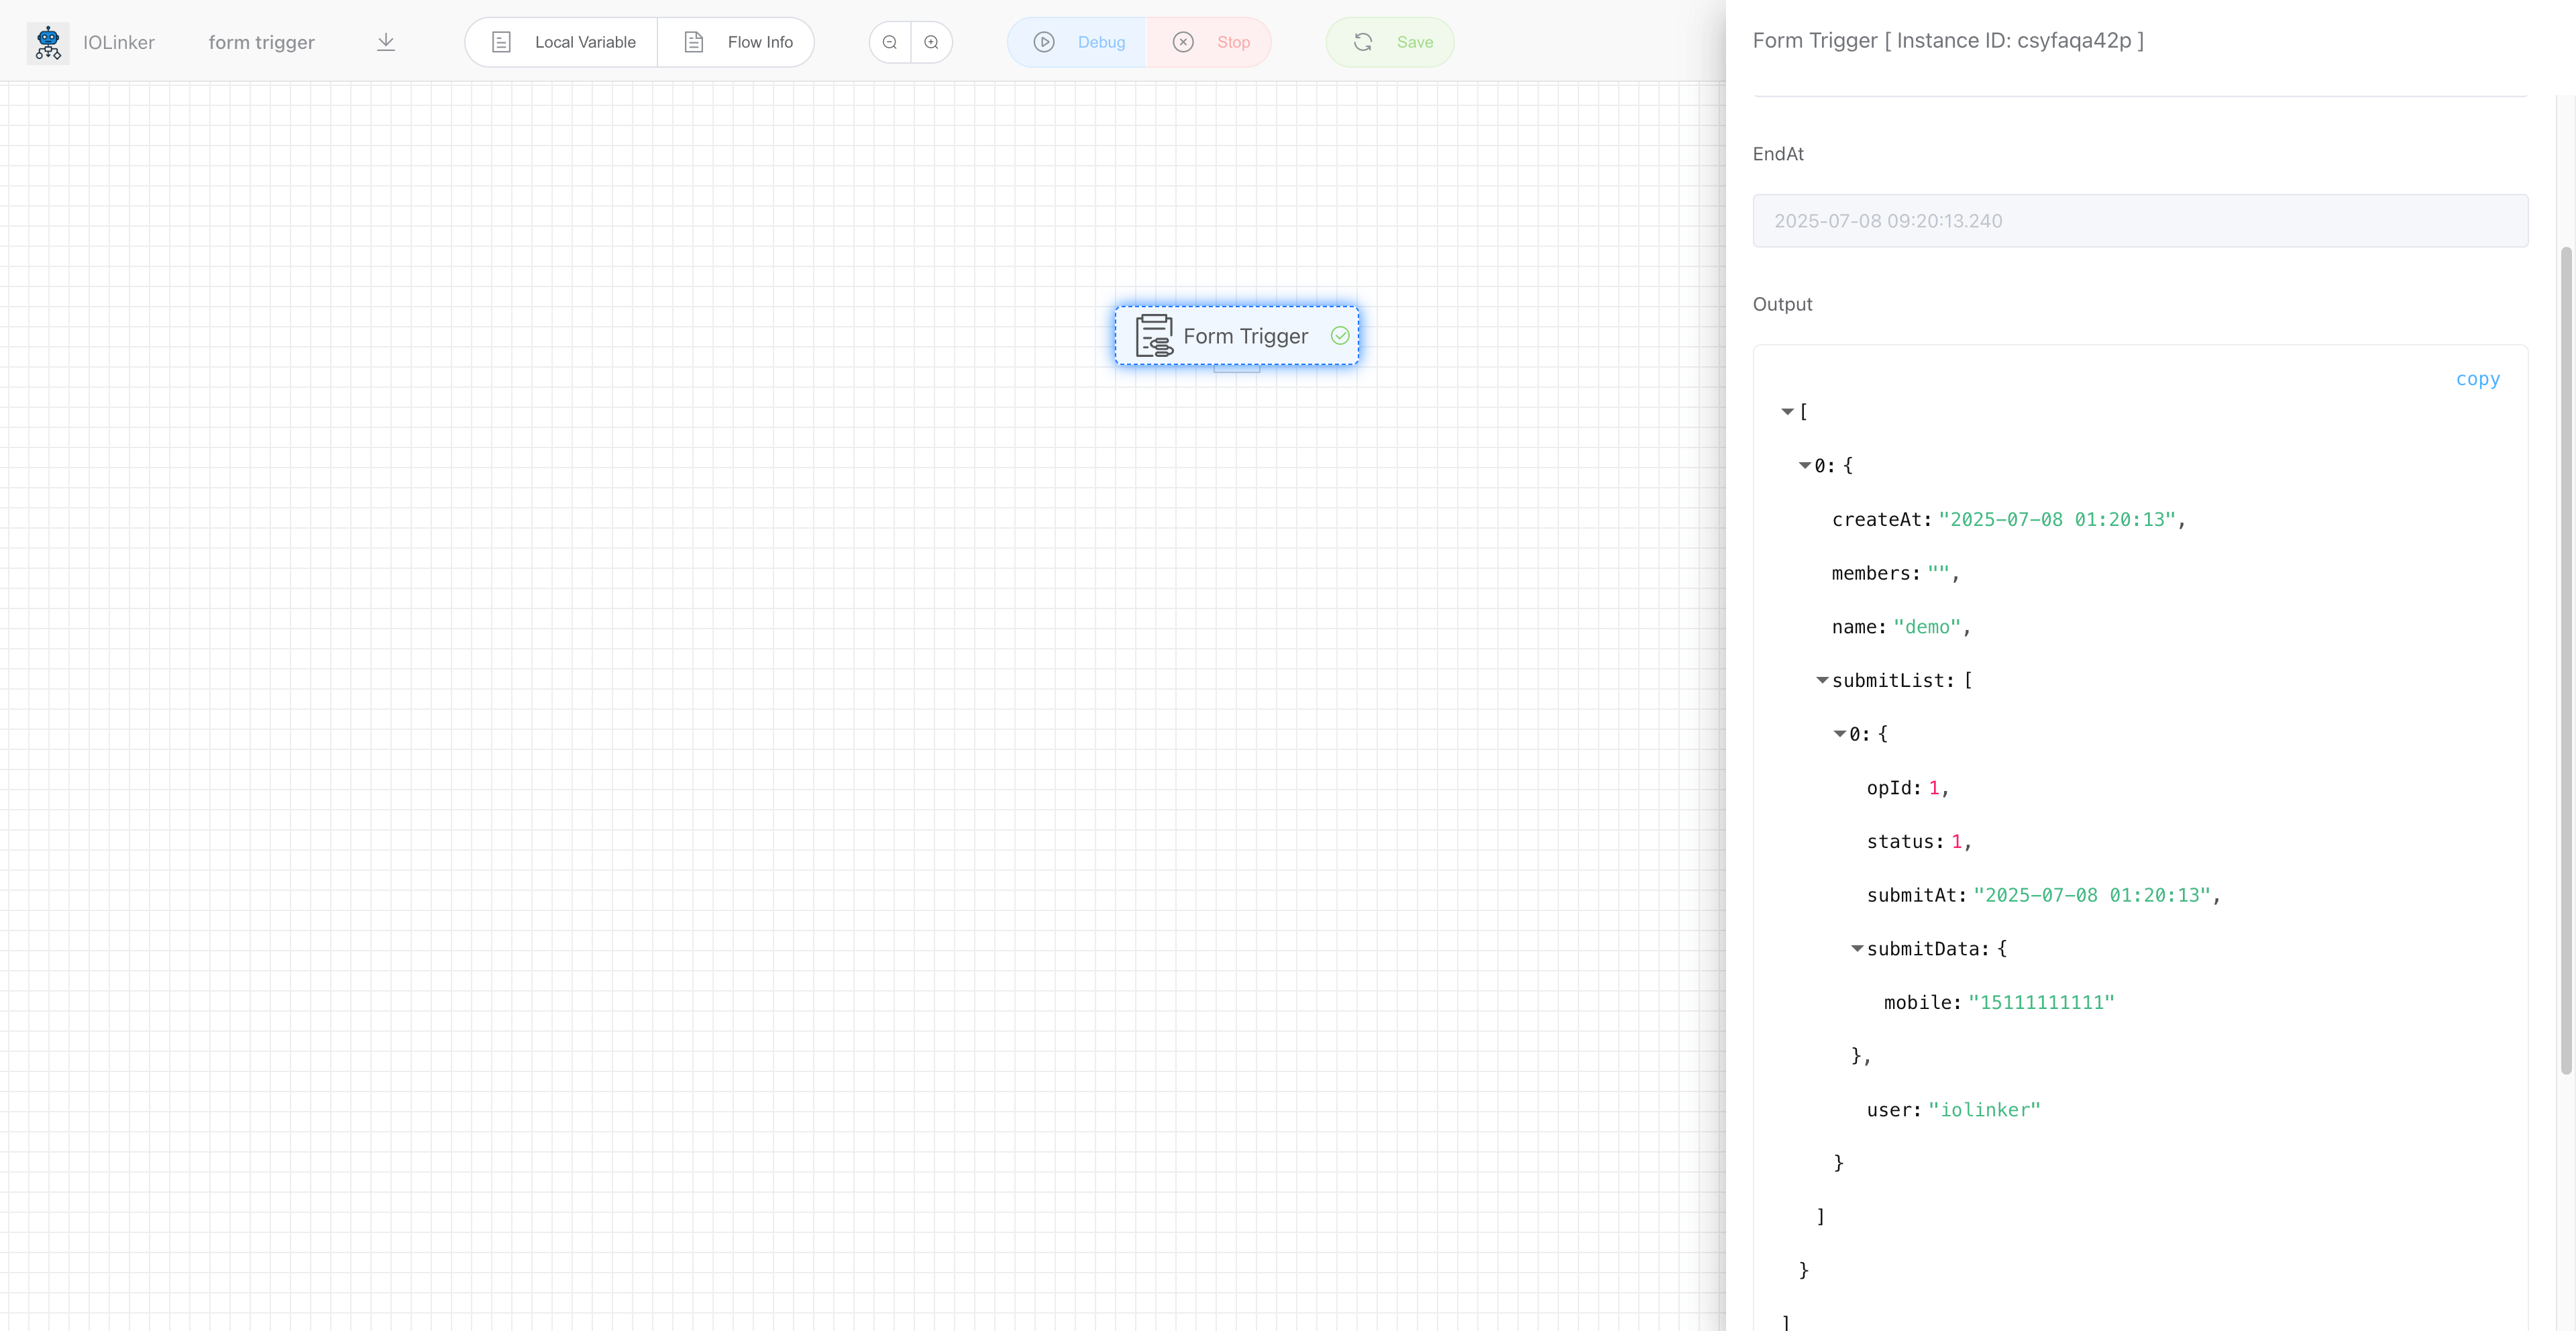
# 5. View form submission records
Form submission record (workflow execution record):

Click View Details to see the data submitted by the form:
# Input
# Form
Here you can drop down and select the form you want to associate.
# Members
Set the members who are allowed to fill in the form. If not set, all members in the project space can submit the form.
# Output
As shown below, the output will show the data submitted by the submitter at the time, as well as the values of each option in the form (under submitData).
[
  {
    "createAt": "2025-05-07 20:31:29",
    "members": "",
    "name": "form demo",
    "submitList": [
      {
        "opId": 43,
        "status": 1,
        "submitAt": "2025-05-07 20:31:29",
        "submitData": {
          "mobile": "15111111111"
        },
        "user": "iolinker"
      }
    ]
  }
]